
Join, Join DM, and Leave Messages
These plugins let you create highly customizable join, join DM and leave messages. You can use text messages, rich embeds (a Premium feature), or even dynamic image banners to welcome new members.
Useful Information
A tutorial video on how to set up the Invite Tracker bot!
Main Message Types
Join, join DM, and leave messages are very similar. The main differences are when they are sent, where they are sent, and which variables you can use in them. Each one has its own page on the dashboard: Join messages, Join DM messages and Leave messages.
For our examples, we will be configuring a join message.
INFO
You can find an explanation of all the differences between the main message types here.
Variables
Usually, you want the message to display information that changes depending on who just joined or who invited them. The way to add this kind of information is by using variables, like %member% or %inviter_invites%.
When you type a % in any message box of the dashboard, a list of matching variables appears so you can pick one without having to remember its exact name.
INFO
You can find the complete list of variables here.
Configuration
TIP
Join messages can also be enabled without the dashboard: pick a channel on the setup panel the bot posts when it joins your server, or run /setup in your server. This enables them with the default message and posts a sample right away. The dashboard remains the place to customize the wording, embeds and banners.
Enabled
First, you want to enable the plugin. Click the toggle to do so.

WARNING
A channel has to be selected before join or leave messages can be enabled. If the selected channel is deleted, the messages stop and the page shows no channel with a warning until you pick a new one and save: opening the page never picks a channel for you.
Channel
Next, select the channel you want your message to be sent in.

INFO
Join DM messages are sent as a direct message to the new member, so they do not have a channel setting.
Emoji
You can also set Invite Tracker to react with an emoji to every join message by entering the emoji directly or by using the emoji code. This setting is only available for join messages.

To use a custom emoji, send the following message in any Discord server: \:emoji name:. Discord will replace it with something that looks like this: <:invitetracker:744565894289555456>. If you take that text and put it into the dashboard, Invite Tracker will react with that emoji.
TIP
Inside the messages and embeds themselves, you can write an emoji of your server as :emoji_name: and Invite Tracker will turn it into the custom emoji when you save. After saving, the dashboard shows it as its emoji code, like <:invitetracker:744565894289555456>.
Configuring a Sub-Message Type
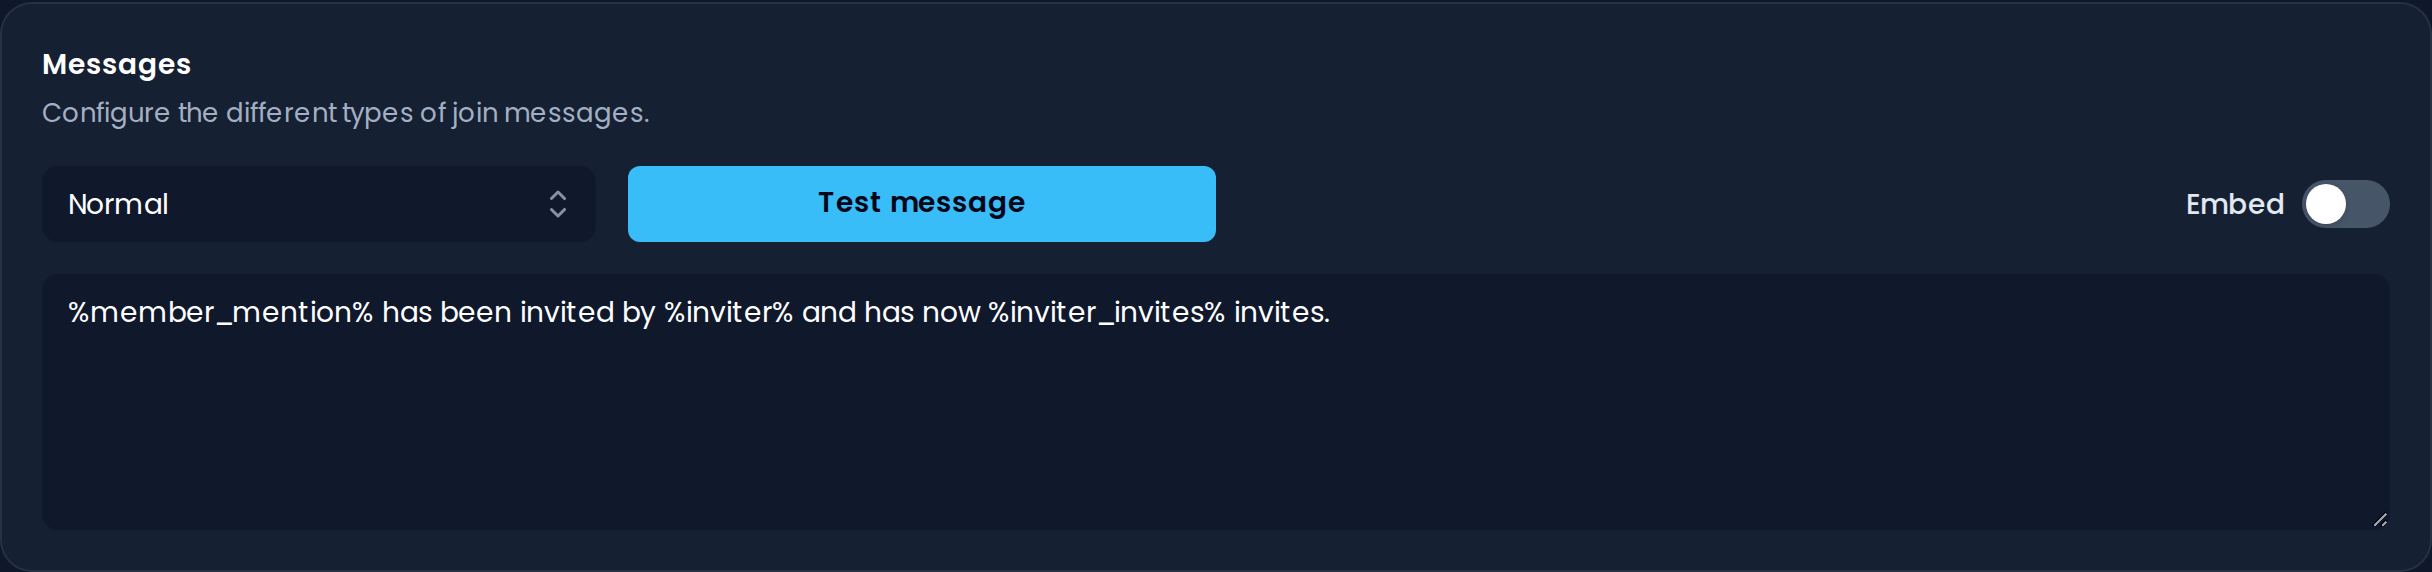
After you have chosen a channel, continue down to the Message content section of the page. In the Messages card you will find a message type dropdown, a blue Test message button, an Embed switch, and a large text box. The dropdown is set to Normal by default, but you may change it to edit another message type.
Every message type already has a default message that you can use as is, like the one shown below.
INFO
A list explaining all the different sub-message types and their use can be found here.
Premium feature
Configuring the Vanity sub-message type requires Invite Tracker Premium.
Messages per Invite Label
Premium feature
Giving an invite label its own join or leave message requires Invite Tracker Premium.
Under the Messages card, the Invite label messages card lets you give each invite label of your server a message of its own. Pick a label in its dropdown (each one is listed with its invite code) and write the message Invite Tracker sends instead of the regular one when a member who joined through that invite joins or leaves: a label on an invite code replaces the Normal message, a label on your vanity invite replaces the Vanity message.
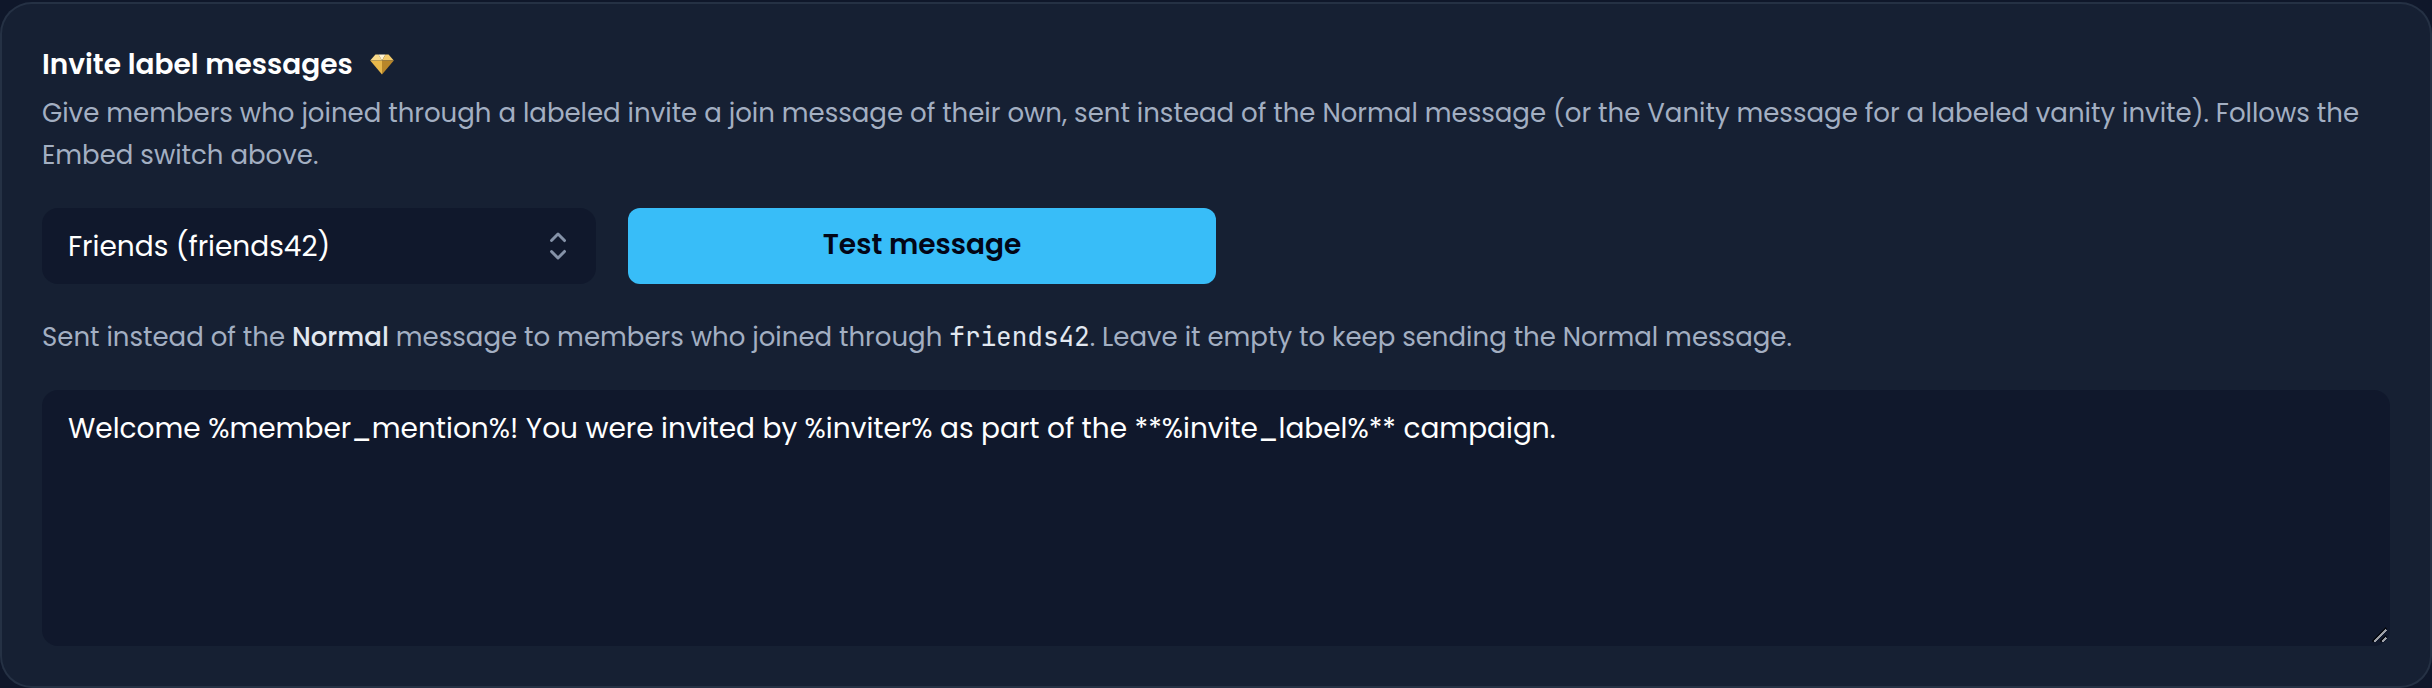
The label's message works exactly like the regular ones: the same variables, the same 2000 character limit, and the embed editor when the Embed switch of the Messages card is on. Leave it empty to keep sending the regular message to members who joined through that invite.
The card's own Test message button tests the selected label's message as if you had joined (or left) through its invite.
TIP
Labels are created on the Invite Tracking page; the card points you there while your server has none. Deleting a label there also deletes its messages.
The Message
Creating the Message
When you have chosen the message type you want to configure, you can write your message in the large text box. This is what Invite Tracker sends when someone joins the server. The message can be anything you like, up to 2000 characters, and supports Discord markdown such as **bold**.
INFO
If you'd like to customize your own message, be sure to check out the variables you can use.
Testing the Message
After you have created your message, save your changes and click the blue Test message button. Invite Tracker will send the saved message to the configured join or leave channel (or as a direct message to you for join DM messages), using you as the new member and the bot itself as the inviter.

The message will appear as you configured it. Here is the default message, but you can go as crazy as you want with your join message. Your mind is your only limit.

TIP
The test uses the saved version of your message, so save your changes before testing. You can send a test message once every 10 seconds.
DANGER
If your test message does not appear, you need to ensure the bot has the correct permissions in the configured channel.
If Discord keeps refusing the bot's join or leave messages in a channel, Invite Tracker pauses that kind of message (text, embed or banner) there for a few minutes, so a few messages can be skipped right after you fix the permissions.
WARNING
Remember to turn on join messages after you finish configuring your message by clicking the Enabled switch at the top of the page.
Embed
Premium feature
Rich embeds for join and leave messages require Invite Tracker Premium.
Embeds are a cool way to make join and leave messages. Embeds bring a lot more customization to the table. You can configure anything from a 5-part story about a potato falling in love with a green rock, to a message that displays all the variables, their function, and where to use them. Trust me, I have done it.
To enable and start configuring an embed, click the Embed switch on the right side of the Messages card.
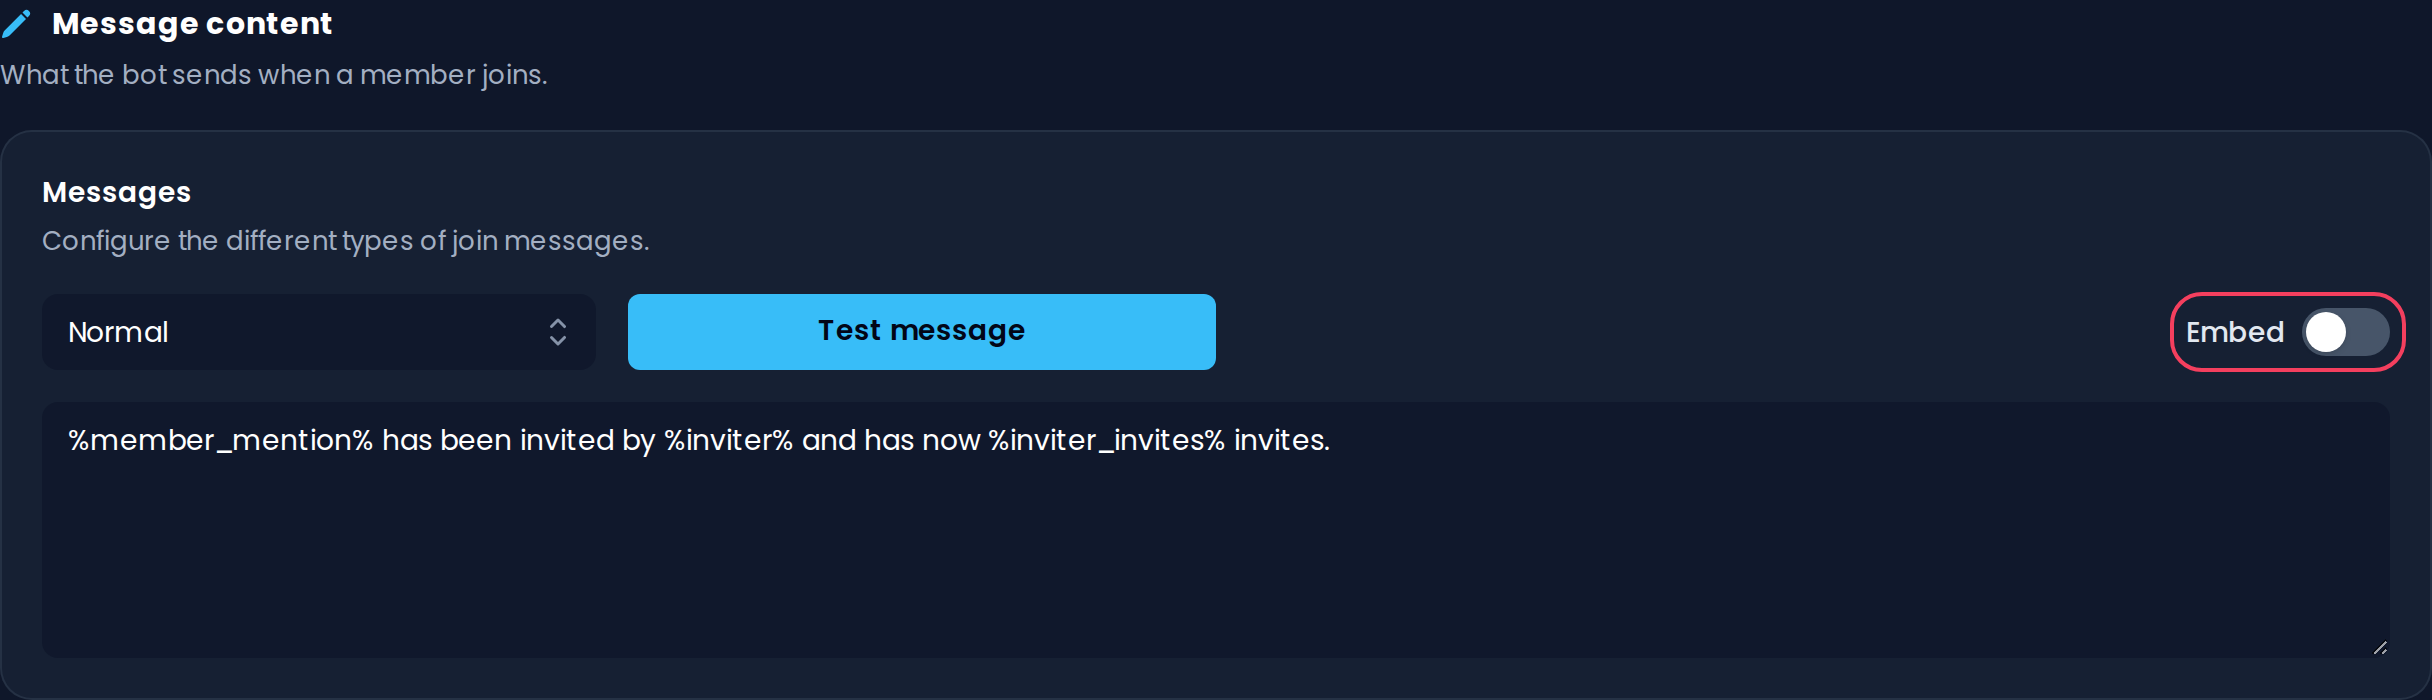
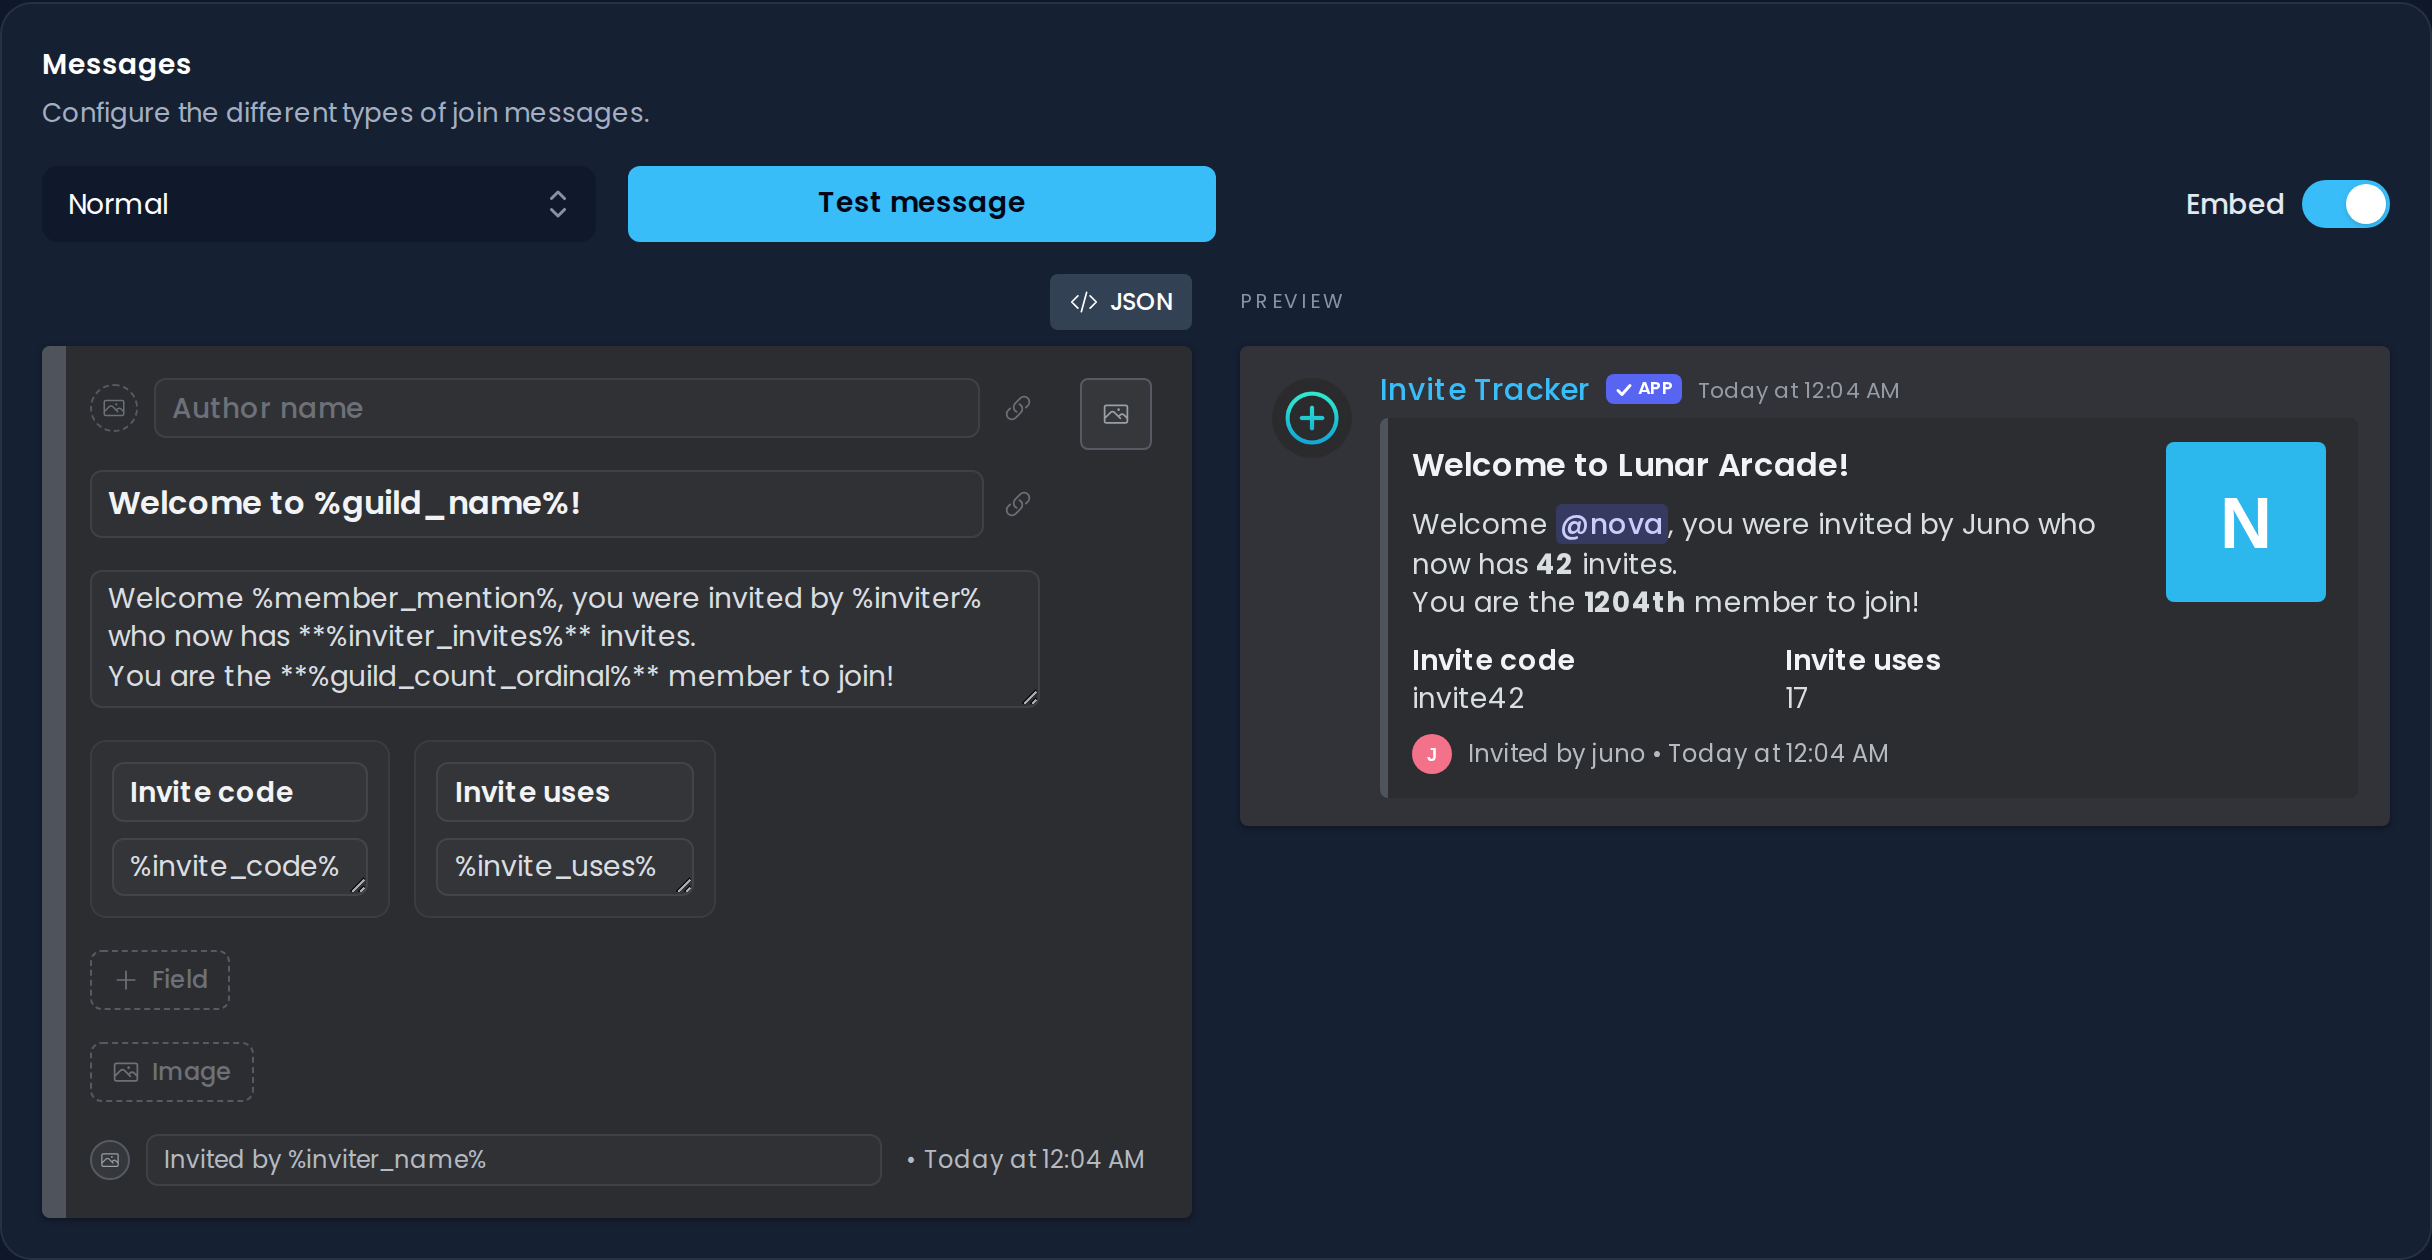
Once it is enabled, the embed editor replaces the text box. It is laid out just like a real Discord embed (you type directly into the parts of the embed), and a live Preview on the right shows how the message will look in Discord, with sample values filled in for the variables.
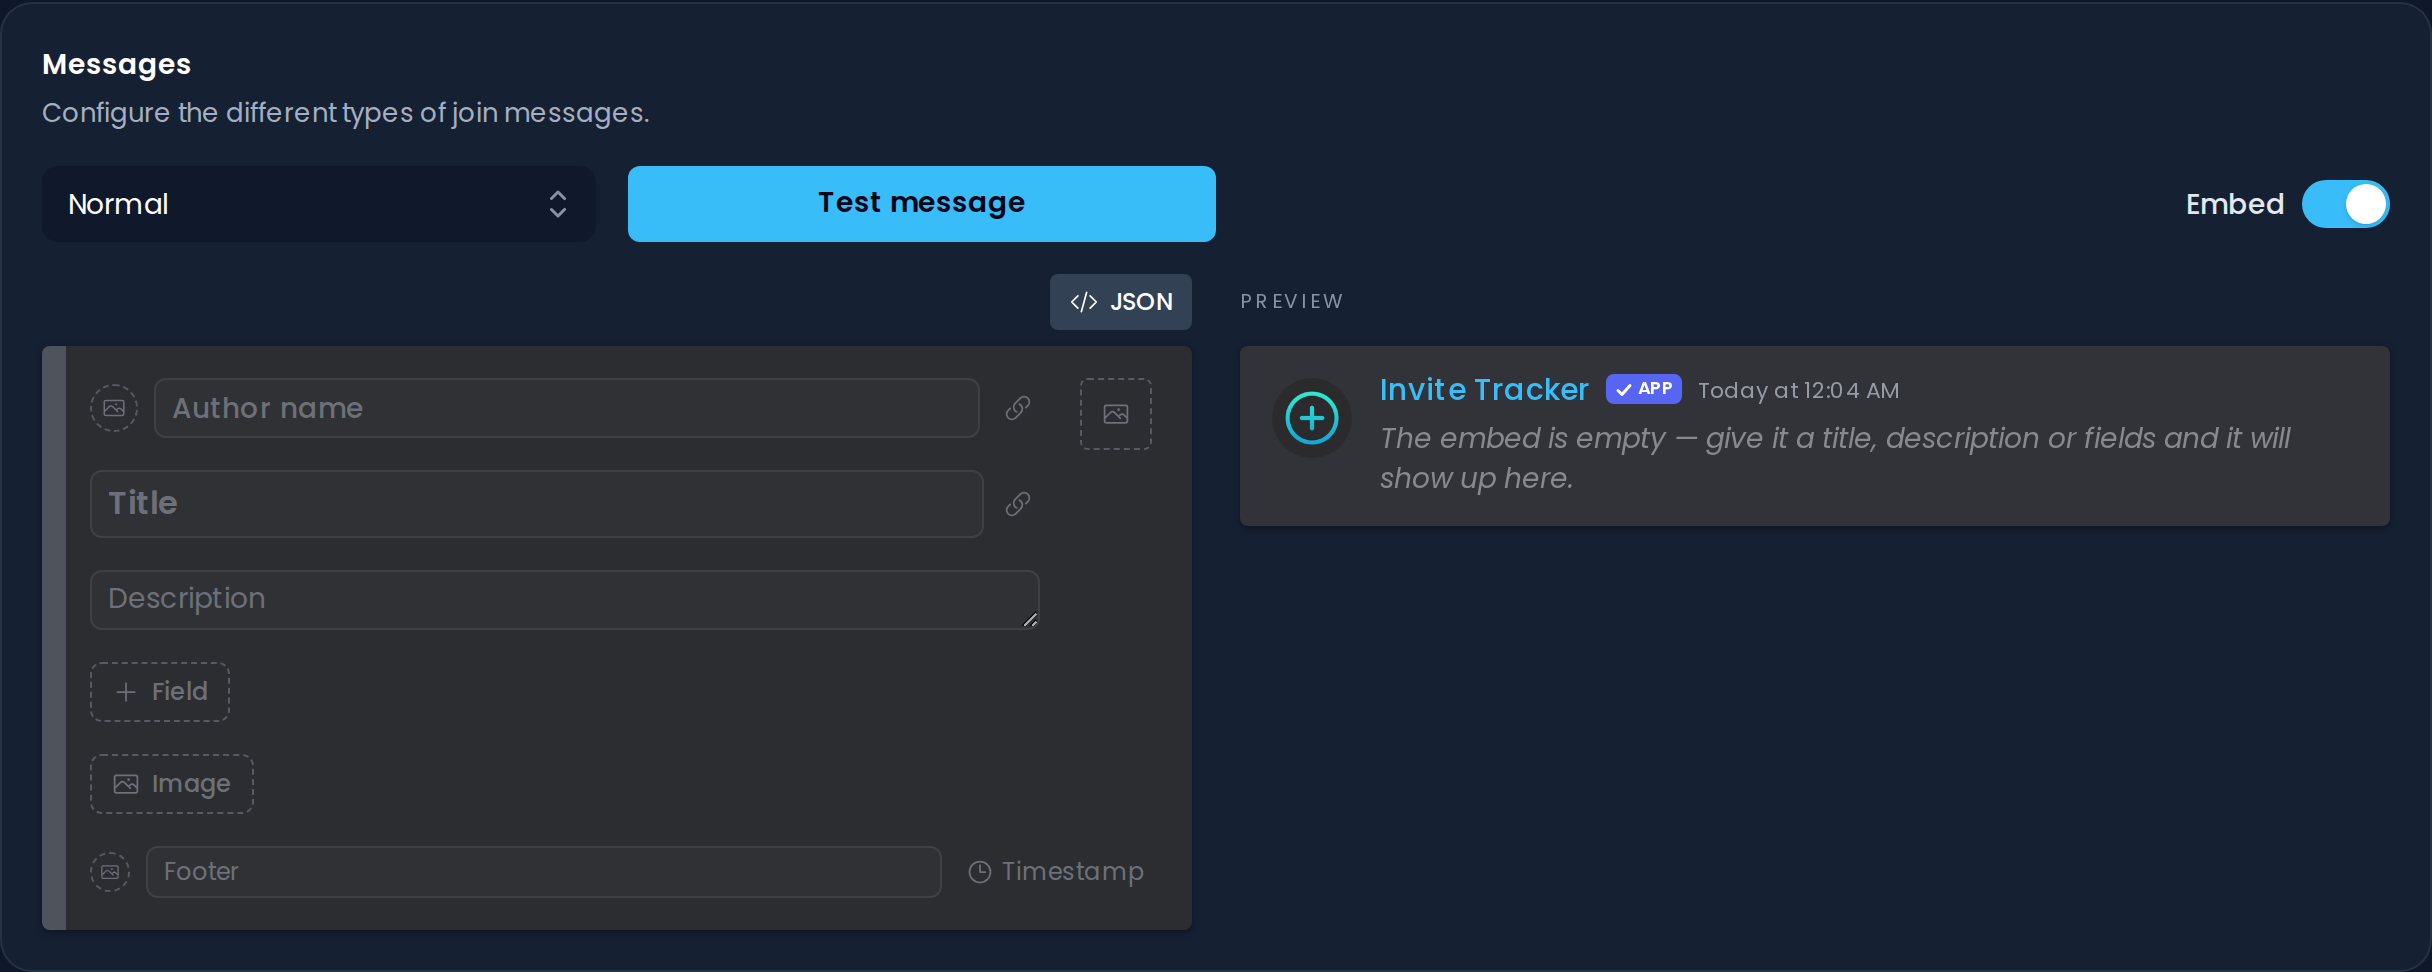
An overview of where everything is placed in the embed can be found below.

Now that you have a general idea of how the embed looks and what goes where, here is an explanation of every part of the editor.
Author
- Author name is a regular text box where you can add whatever you want. Keep in mind that bold, italic, strikethrough and code formatting do not work here.
- The small Author icon placeholder to the left of the author name sets the author icon. Click it and enter either a picture link or an avatar variable. It is displayed as a small round picture in the top left corner of the embed.
- The Author link icon next to the author name lets you add a URL that turns the author name into a link.
Title
- Title is a regular text box where you can add whatever you want.
- The Title link icon next to the title lets you add a URL that turns the title into a link.
Content
- Description is a regular text box where you can add whatever you want.
- + Field adds a field with a Name and a Value. Each field has buttons to show it Inline (side by side with other inline fields), move it up or down, or remove it. An embed can have up to 25 fields.
Pictures
- The Image placeholder at the bottom of the editor is where you can put either a picture link or an avatar variable. It is displayed as a large picture at the bottom of the embed.
- The dashed Thumbnail placeholder at the top right is where you can put either a picture link or an avatar variable. It is displayed as a medium-sized picture at the top right of the embed.
INFO
Picture fields accept a link starting with http:// or https://, or one of these variables: %member_avatar%, %guild_avatar%, and %inviter_avatar% (the last one only in the Normal message type, since the other types have no known inviter).
Footer
- Footer is a regular text box where you can add whatever you want. Keep in mind that bold, italic, strikethrough and code formatting do not work here.
- The small Footer icon placeholder to the left of the footer text sets the footer icon, using either a picture link or an avatar variable. A footer icon can only be used together with footer text.
- Timestamp, next to the footer text, shows at what time the message was sent.
Extra
- The JSON button lets you copy, paste or edit the JSON of the embed.
- The color rail on the left edge of the editor sets the color of the embed's side line. Click it to open the color picker, where you can also enable Random color to get a new color for every message.
- The Preview on the right always shows the current state of your embed as it will appear in Discord.
Taking everything we now know about embeds, we can make a simple embed message that looks like this:
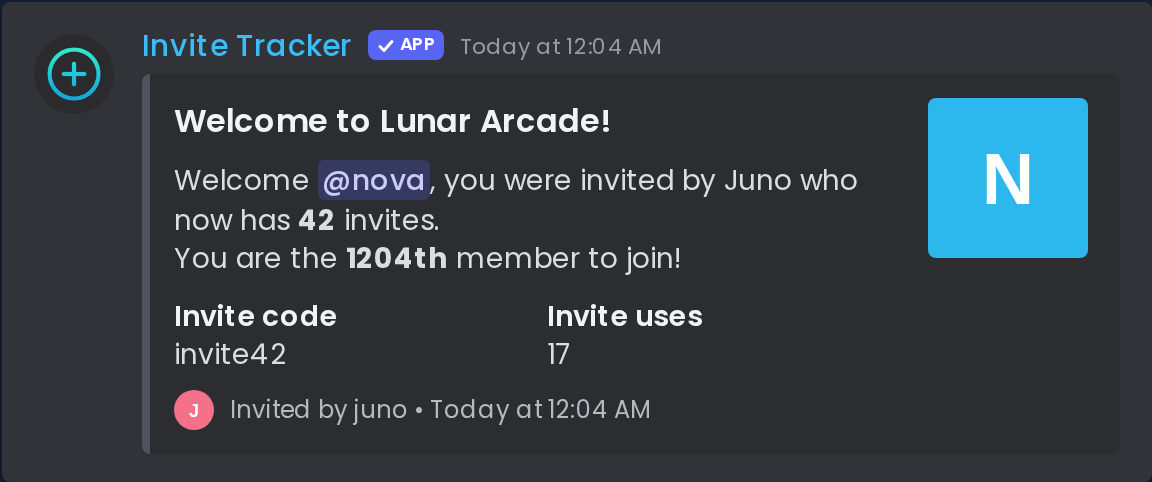
When a member joins (or when you click the Test message button after saving), Invite Tracker sends the embed with the variables replaced, just like the preview shows:
INFO
There is really no right or wrong way to use all the embed boxes, just play around with it until you find something you like.
WARNING
Each part of the embed has a length limit: 256 characters for the author name, the title and field names, 2048 for the description and the footer, 1024 for field values, and 6000 for the whole embed. A small counter appears above a box when you get close to its limit.
TIP
If you enable embeds but leave the embed empty, Invite Tracker sends a simple default embed instead: titled "Join" or "Leave", with your text message as the description and the member's avatar as the thumbnail.
WARNING
You cannot use embeds for join DM messages.
Leave Messages
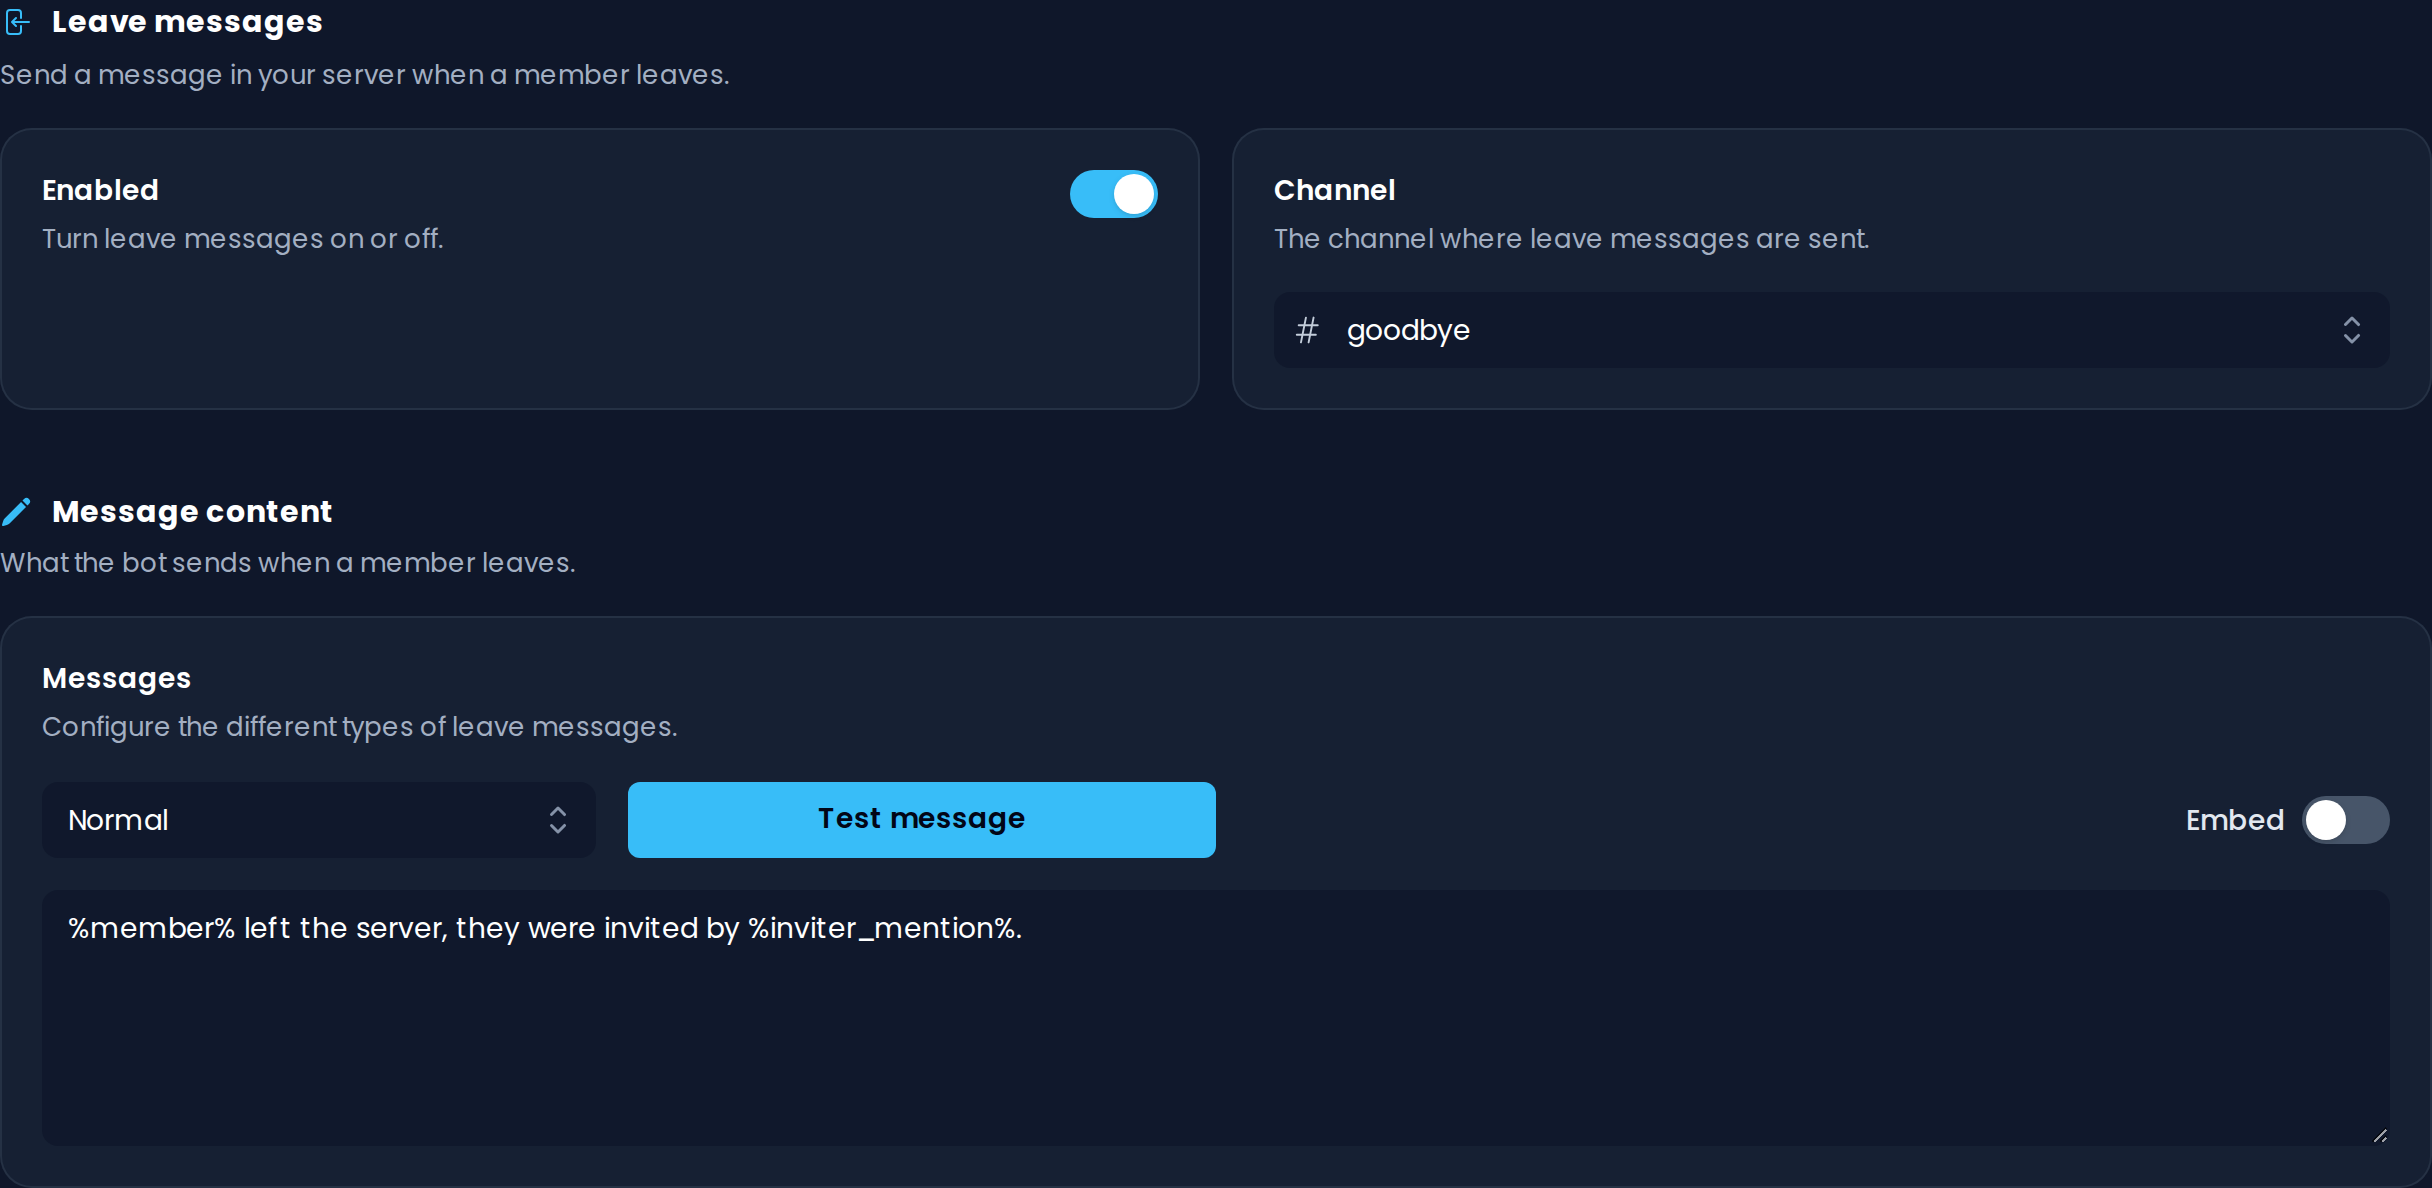
Leave messages are configured on the Leave messages page, exactly like join messages: an Enabled switch, a Channel, and a Messages card with the same sub-message types, test button and embed editor. The only differences are that leave messages have no emoji reaction and no welcome banner.
Join DM Messages
Join DM messages are sent as a direct message to every new member. They are configured on the Join DM messages page, which has an Enabled switch and a single Message box, with a Test message button that sends the message to your own DMs.
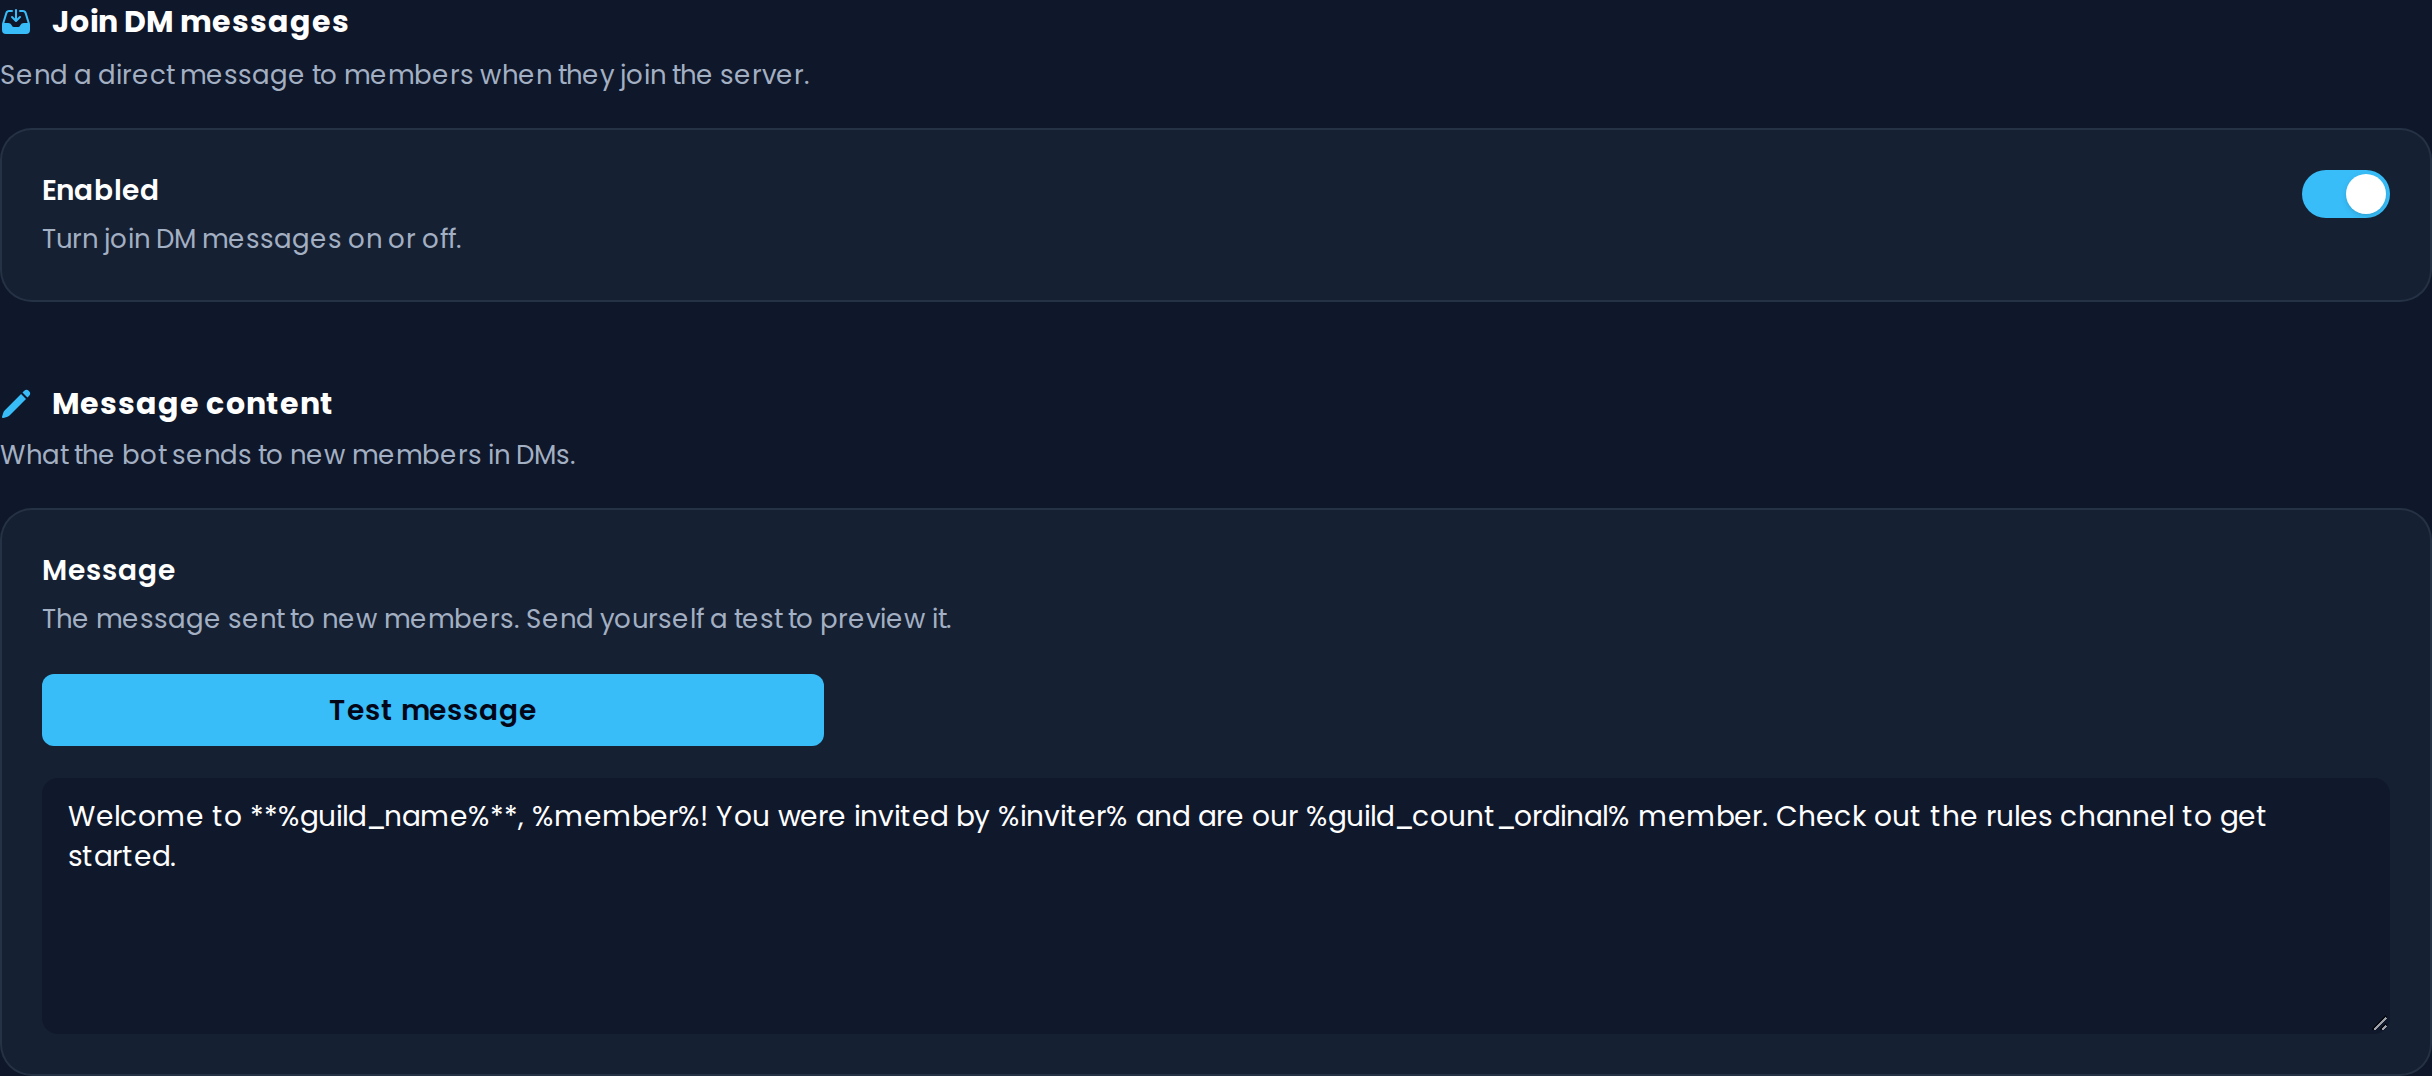
- Join DM messages are text only (up to 2000 characters): embeds, sub-message types and banners are not available.
- There is no default join DM message. Nothing is sent until you write one.
- The message comes with a button showing which server it was sent from.
- Members who don't accept direct messages from server members will not receive it.
Welcome Banners
Premium feature
Basic welcome banners (the Normal banner type with limited design elements) are free. All other banner types and the advanced design features require Invite Tracker Premium. See the free vs Premium banner features.
In addition to text and embed messages, you can attach a dynamic image banner to your join messages, with your own backgrounds, images, shapes, the joining member's avatar and text with variables. See the Welcome Banner page to learn how to design one.